
Building a Self-Hosted VPN Gateway for Your Homelab
A VPN gateway is a dedicated box in your homelab whose only job is handling VPN connections. Instead of running WireGuard or OpenVPN on your main server, your router, or a random VM, you deploy a purpose-built gateway that sits at the edge of your network, handles encryption, enforces access policies, and routes traffic between remote clients and your internal services.
Photo by Claudio Schwarz on Unsplash
Why dedicate a whole machine (or VM) to this? Because VPN is security infrastructure. Mixing it with your Plex server or NAS means a misconfiguration in one can compromise the other. A dedicated gateway has a minimal attack surface, clear firewall rules, and can be hardened independently.
This guide builds a WireGuard-based VPN gateway from scratch — from choosing hardware through to split tunneling, DNS, firewall rules, and monitoring. By the end, you'll have a single entry point for all remote access to your homelab.
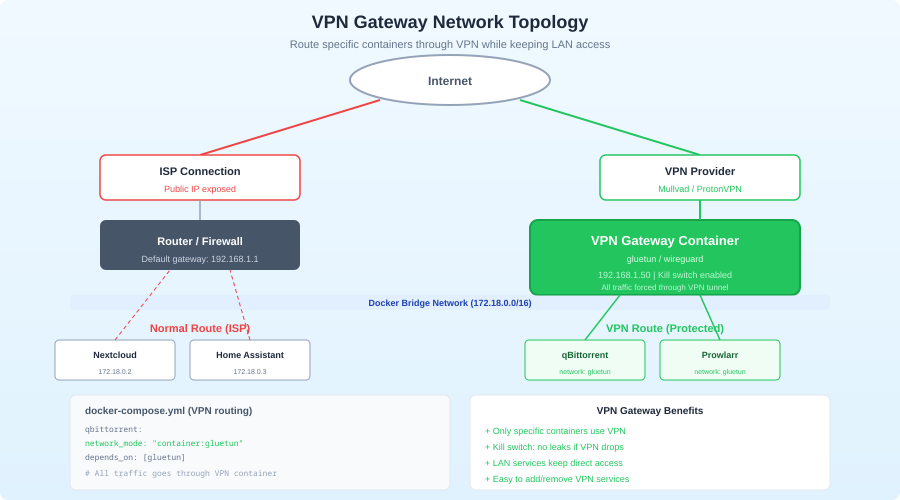
Architecture Overview
The gateway sits between the internet and your LAN:
                                    Your Homelab LAN
                                   ┌─────────────────────────────┐
Internet ──▶ Router ──▶ Port Fwd ──▶│  VPN Gateway               │
  (UDP 51820)                       │  ┌──────────┐              │
                                    │  │ WireGuard│──▶ NAS       │
Remote clients ═══WG Tunnel════════▶│  │ + nftables│──▶ Proxmox  │
                                    │  │ + DNS    │──▶ Services  │
                                    │  └──────────┘              │
                                    └─────────────────────────────┘
The gateway has:
- A WireGuard interface accepting client connections
- Firewall rules (nftables) controlling what clients can access
- A local DNS resolver for internal name resolution
- Routing between the VPN subnet and your LAN
- Logging and monitoring
Clients connect to the gateway, get an IP on the VPN subnet, and the gateway routes their traffic to internal services based on policy.
Choosing Hardware
The gateway doesn't need much power. WireGuard runs in the kernel and handles gigabit-speed encryption on modest hardware:
Option 1: Dedicated Mini PC (Recommended)
A small, low-power box like:
- Intel N100 mini PC: ~$120, 4 cores, 6W TDP, handles multiple gigabits of WireGuard throughput
- Lenovo M720q/M920q Tiny: ~$80 used, reliable, quiet
- Protectli Vault VP2420: ~$300, multiple Ethernet ports, purpose-built for network appliances
For a VPN gateway, dual NICs are nice (WAN-facing and LAN-facing) but not required. A single NIC works fine — the router handles WAN/LAN separation, and the gateway just needs one LAN connection.
Option 2: Virtual Machine
If you're already running Proxmox or another hypervisor:
CPU: 1-2 vCPUs
RAM: 512MB-1GB
Disk: 8-16GB
Network: Bridged to your LAN
The downside of a VM is dependency on the hypervisor. If Proxmox goes down for maintenance, your VPN goes with it. A physical gateway stays up independently.
Option 3: Raspberry Pi
A Pi 4 or Pi 5 handles WireGuard fine for a few clients. Not ideal for high-throughput scenarios (the Ethernet on Pi 4 is USB-attached), but perfectly adequate for remote access to a homelab.
OS Setup
Use a minimal Linux installation. No desktop, no unnecessary packages:
Ubuntu Server (Recommended for Beginners)
# During installation, select minimal server
# After installation:
sudo apt update && sudo apt upgrade -y
sudo apt install wireguard wireguard-tools nftables unbound qrencode
Alpine Linux (Recommended for Minimal Attack Surface)
Alpine is purpose-built for appliances. Tiny footprint, musl libc, no systemd:
apk update
apk add wireguard-tools nftables unbound qrencode
Fedora Server
sudo dnf install wireguard-tools nftables unbound qrencode
Whichever distro you choose, enable automatic security updates:
# Ubuntu
sudo apt install unattended-upgrades
sudo dpkg-reconfigure -plow unattended-upgrades

# Fedora
sudo dnf install dnf-automatic
sudo systemctl enable --now dnf-automatic-install.timer
Want more networking guides? Get guides like this in your inbox — HomeLab Starter delivers one free deep-dive every week.
WireGuard Server Configuration
Generate Server Keys
sudo mkdir -p /etc/wireguard
cd /etc/wireguard

# Generate keys
umask 077
wg genkey | tee server.key | wg pubkey > server.pub
Server Configuration
Create /etc/wireguard/wg0.conf:
[Interface]
# Server's private key
PrivateKey = <contents of server.key>

# VPN subnet — the gateway gets .1
Address = 10.100.0.1/24

# WireGuard listen port
ListenPort = 51820

# Save peer state across restarts
SaveConfig = false

# Post-up: enable forwarding and NAT
PostUp = sysctl -w net.ipv4.ip_forward=1
PostUp = nft add table nat
PostUp = nft add chain nat postrouting { type nat hook postrouting priority 100 \; }
PostUp = nft add rule nat postrouting oifname "eth0" masquerade

PostDown = nft delete table nat
PostDown = sysctl -w net.ipv4.ip_forward=0
Make IP forwarding persistent:
echo "net.ipv4.ip_forward=1" | sudo tee /etc/sysctl.d/99-vpn-gateway.conf
sudo sysctl -p /etc/sysctl.d/99-vpn-gateway.conf
Adding Peers (Clients)
For each client, generate a key pair and add a [Peer] section:
# Generate client keys (can be done on the gateway or the client)
wg genkey | tee client1.key | wg pubkey > client1.pub

# Generate preshared key (optional, adds post-quantum resistance)
wg genpsk > client1.psk
Add to /etc/wireguard/wg0.conf:
# Laptop
[Peer]
PublicKey = <contents of client1.pub>
PresharedKey = <contents of client1.psk>
AllowedIPs = 10.100.0.10/32

# Phone
[Peer]
PublicKey = <contents of client2.pub>
PresharedKey = <contents of client2.psk>
AllowedIPs = 10.100.0.11/32
Each peer gets a unique /32 address in the VPN subnet.
Client Configuration
Create a config file for each client:
# client1.conf (for laptop)
[Interface]
PrivateKey = <contents of client1.key>
Address = 10.100.0.10/24
DNS = 10.100.0.1

[Peer]
PublicKey = <contents of server.pub>
PresharedKey = <contents of client1.psk>
Endpoint = your-public-ip-or-ddns:51820
AllowedIPs = 10.100.0.0/24, 192.168.1.0/24
PersistentKeepalive = 25
The AllowedIPs on the client side determines what traffic goes through the tunnel:
0.0.0.0/0: All traffic (full tunnel) — everything routes through your homelab10.100.0.0/24, 192.168.1.0/24: Split tunnel — only homelab traffic goes through the VPN, internet traffic uses the local connection
Split tunneling is almost always what you want for homelab access. Full tunnel is useful if you want to use your home internet connection from remote locations (e.g., to appear on your home IP).
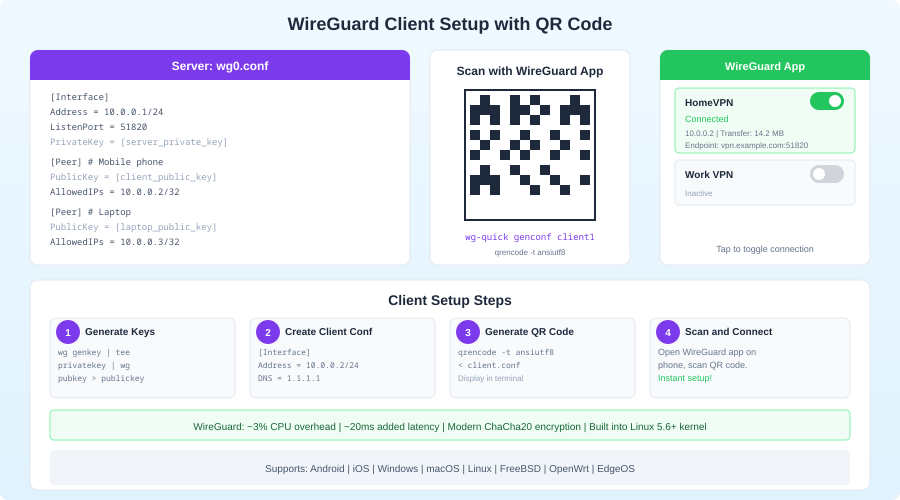
Generate QR Codes for Mobile
qrencode -t ansiutf8 < client2.conf
Scan this with the WireGuard app on iOS or Android. No need to manually enter configuration.
Start the VPN
sudo systemctl enable --now wg-quick@wg0

# Verify
sudo wg show
Port Forwarding
On your router, forward UDP port 51820 to the gateway's LAN IP:
Protocol: UDP
External Port: 51820
Internal IP: 192.168.1.50 (your gateway's LAN IP)
Internal Port: 51820
If you're behind CGNAT (common with some ISPs), port forwarding won't work. You'll need a Cloudflare Tunnel or a cloud VPS as a relay. That's a different architecture — this guide assumes you have a public IP or working DDNS.
Firewall: nftables Rules
The default PostUp rules enable basic NAT. For a proper gateway, you want explicit access control:
# /etc/nftables.conf

#!/usr/sbin/nft -f

flush ruleset

table inet filter {
    chain input {
        type filter hook input priority 0; policy drop;

        # Allow established connections
        ct state established,related accept

        # Allow loopback
        iif lo accept

        # Allow WireGuard
        udp dport 51820 accept

        # Allow SSH from LAN only
        iifname "eth0" tcp dport 22 accept

        # Allow DNS from VPN clients
        iifname "wg0" tcp dport 53 accept
        iifname "wg0" udp dport 53 accept

        # Allow ICMP
        icmp type echo-request accept
        icmpv6 type { echo-request, nd-neighbor-solicit, nd-router-advert, nd-neighbor-advert } accept

        # Log and drop everything else
        log prefix "nft-drop: " drop
    }

    chain forward {
        type filter hook forward priority 0; policy drop;

        # Allow established connections
        ct state established,related accept

        # VPN clients to LAN — this is where you enforce policy
        iifname "wg0" oifname "eth0" accept

        # Block VPN-to-VPN traffic (optional, prevents clients seeing each other)
        iifname "wg0" oifname "wg0" drop

        # Log and drop everything else
        log prefix "nft-fwd-drop: " drop
    }

    chain output {
        type filter hook output priority 0; policy accept;
    }
}

table inet nat {
    chain postrouting {
        type nat hook postrouting priority 100;

        # NAT VPN traffic to LAN
        oifname "eth0" masquerade
    }
}
Enable nftables:
sudo systemctl enable --now nftables
Per-Client Access Control
Want different clients to have different access? Use nftables with VPN IPs:
# Full access for your laptop
iifname "wg0" ip saddr 10.100.0.10 oifname "eth0" accept

# Limited access for a friend — only media server
iifname "wg0" ip saddr 10.100.0.20 oifname "eth0" ip daddr 192.168.1.100 tcp dport {8096, 8920} accept
iifname "wg0" ip saddr 10.100.0.20 oifname "eth0" drop
This gives fine-grained control. Your laptop reaches everything. Your friend's device can only reach Jellyfin.
DNS on the Gateway
Running a local DNS resolver on the gateway gives VPN clients proper name resolution for internal services:
Unbound Configuration
# /etc/unbound/unbound.conf
server:
    interface: 10.100.0.1
    interface: 127.0.0.1
    port: 53
    access-control: 10.100.0.0/24 allow
    access-control: 127.0.0.0/8 allow

    # Performance
    num-threads: 2
    msg-cache-size: 16m
    rrset-cache-size: 32m
    cache-min-ttl: 3600
    cache-max-ttl: 86400

    # Privacy
    hide-identity: yes
    hide-version: yes
    qname-minimisation: yes

    # Internal DNS records
    local-zone: "homelab.local." static
    local-data: "nas.homelab.local. A 192.168.1.100"
    local-data: "proxmox.homelab.local. A 192.168.1.101"
    local-data: "jellyfin.homelab.local. A 192.168.1.102"
    local-data: "grafana.homelab.local. A 192.168.1.103"
    local-data: "homeassistant.homelab.local. A 192.168.1.104"
    local-data: "gateway.homelab.local. A 10.100.0.1"

    # Forward external queries to upstream
    forward-zone:
        name: "."
        forward-addr: 1.1.1.1
        forward-addr: 9.9.9.9
sudo systemctl enable --now unbound
Now VPN clients can access services by name: http://jellyfin.homelab.local:8096 instead of remembering IP addresses.
Integration with Pi-hole
If you're running Pi-hole on your LAN, point Unbound's forwarding to Pi-hole for ad-blocking on VPN clients too:
    forward-zone:
        name: "."
        forward-addr: 192.168.1.53  # Pi-hole
Client Management Script
Managing WireGuard peers manually is tedious. Here's a script that automates client creation:
#!/bin/bash
# /usr/local/bin/wg-add-client.sh

set -euo pipefail

WG_CONF="/etc/wireguard/wg0.conf"
WG_DIR="/etc/wireguard/clients"
SERVER_PUB=$(cat /etc/wireguard/server.pub)
ENDPOINT="vpn.yourdomain.com:51820"
DNS="10.100.0.1"
VPN_SUBNET="10.100.0"

if [ $# -ne 2 ]; then
    echo "Usage: $0 <client-name> <last-octet>"
    echo "Example: $0 laptop 10"
    exit 1
fi

CLIENT_NAME="$1"
OCTET="$2"
CLIENT_IP="${VPN_SUBNET}.${OCTET}"
CLIENT_DIR="${WG_DIR}/${CLIENT_NAME}"

mkdir -p "$CLIENT_DIR"
cd "$CLIENT_DIR"

# Generate keys
wg genkey | tee private.key | wg pubkey > public.key
wg genpsk > preshared.key
chmod 600 private.key preshared.key

CLIENT_PRIV=$(cat private.key)
CLIENT_PUB=$(cat public.key)
CLIENT_PSK=$(cat preshared.key)

# Create client config
cat > "${CLIENT_NAME}.conf" <<EOF
[Interface]
PrivateKey = ${CLIENT_PRIV}
Address = ${CLIENT_IP}/24
DNS = ${DNS}

[Peer]
PublicKey = ${SERVER_PUB}
PresharedKey = ${CLIENT_PSK}
Endpoint = ${ENDPOINT}
AllowedIPs = 10.100.0.0/24, 192.168.1.0/24
PersistentKeepalive = 25
EOF

# Add peer to server config
cat >> "$WG_CONF" <<EOF

# ${CLIENT_NAME}
[Peer]
PublicKey = ${CLIENT_PUB}
PresharedKey = ${CLIENT_PSK}
AllowedIPs = ${CLIENT_IP}/32
EOF

# Reload WireGuard
wg syncconf wg0 <(wg-quick strip wg0)

# Generate QR code
echo ""
echo "=== Client config for ${CLIENT_NAME} ==="
echo "Config file: ${CLIENT_DIR}/${CLIENT_NAME}.conf"
echo ""
echo "QR Code (scan with WireGuard mobile app):"
qrencode -t ansiutf8 < "${CLIENT_NAME}.conf"
sudo chmod +x /usr/local/bin/wg-add-client.sh

# Usage
sudo wg-add-client.sh laptop 10
sudo wg-add-client.sh phone 11
sudo wg-add-client.sh friend-tablet 20
Monitoring the Gateway
WireGuard Status
# Show connected peers, transfer stats, last handshake
sudo wg show

# Example output:
# peer: abc123...
#   endpoint: 73.x.x.x:43721
#   allowed ips: 10.100.0.10/32
#   latest handshake: 23 seconds ago
#   transfer: 1.45 GiB received, 8.73 GiB sent
Prometheus Exporter
Use prometheus-wireguard-exporter for metrics:
# Install
cargo install prometheus_wireguard_exporter

# Or use Docker
docker run -d --name wg-exporter \
  --net=host \
  --cap-add=NET_ADMIN \
  -v /etc/wireguard:/etc/wireguard:ro \
  mindflavor/prometheus-wireguard-exporter
Metrics available:
wireguard_sent_bytes_total— bytes sent per peerwireguard_received_bytes_total— bytes received per peerwireguard_latest_handshake_seconds— last handshake time per peer
Connection Alerting
Alert when a peer hasn't handshaked recently (indicating disconnect):
# Prometheus alerting rule
groups:
  - name: vpn-gateway
    rules:
      - alert: VPNPeerDisconnected
        expr: time() - wireguard_latest_handshake_seconds > 300
        for: 5m
        labels:
          severity: info
        annotations:
          summary: "VPN peer {{ $labels.public_key }} disconnected"
Log Monitoring
With the nftables rules above, dropped packets are logged. Monitor them for intrusion attempts:
# Watch firewall drops
journalctl -f | grep "nft-drop"
Hardening the Gateway
Since this is your network's entry point, lock it down:
SSH Hardening
# /etc/ssh/sshd_config
PermitRootLogin no
PasswordAuthentication no
PubkeyAuthentication yes
AllowUsers yourusername
Port 22  # Consider changing, but security by obscurity isn't real security
Disable Unnecessary Services
# List enabled services
systemctl list-unit-files --state=enabled

# Disable anything you don't need
sudo systemctl disable --now cups bluetooth avahi-daemon
Fail2ban for SSH
sudo apt install fail2ban

# /etc/fail2ban/jail.local
[sshd]
enabled = true
port = ssh
maxretry = 3
bantime = 3600
Automatic Security Updates
Already covered in the OS setup section, but worth emphasizing: a VPN gateway must get security patches promptly. Enable unattended upgrades.
Minimal User Accounts
Only one user account (yours), with sudo access. No shared accounts, no service accounts with shells.
Dynamic DNS
If your ISP gives you a dynamic IP, configure DDNS so your clients can always find the gateway:
# /usr/local/bin/update-ddns.sh
#!/bin/bash
CURRENT_IP=$(curl -s https://api.ipify.org)
LAST_IP_FILE="/var/lib/ddns-last-ip"

LAST_IP=""
if [ -f "$LAST_IP_FILE" ]; then
    LAST_IP=$(cat "$LAST_IP_FILE")
fi

if [ "$CURRENT_IP" != "$LAST_IP" ]; then
    # DuckDNS example
    curl -s "https://www.duckdns.org/update?domains=myhomelab&token=your-token&ip=$CURRENT_IP"
    echo "$CURRENT_IP" > "$LAST_IP_FILE"
    logger -t ddns "Updated DDNS to $CURRENT_IP"
fi
# Run every 5 minutes
# /etc/systemd/system/ddns-update.timer
[Unit]
Description=DDNS update

[Timer]
OnBootSec=60
OnUnitActiveSec=300

[Install]
WantedBy=timers.target
Full Tunnel vs. Split Tunnel
Both modes are useful for different scenarios:
Split Tunnel (Default Recommendation)
Only homelab traffic goes through the VPN. Internet traffic uses the client's local connection.
Client config AllowedIPs:
AllowedIPs = 10.100.0.0/24, 192.168.1.0/24
Pros: Faster internet for the client, less bandwidth on your home upload, lower latency for web browsing Cons: DNS leaks possible if not configured carefully, internet traffic isn't encrypted
Full Tunnel
All client traffic routes through the VPN. The client effectively browses the internet from your home IP.
Client config AllowedIPs:
AllowedIPs = 0.0.0.0/0, ::/0
Pros: All traffic encrypted, use your home network's ad-blocking (Pi-hole), appear on your home IP Cons: Upload bandwidth becomes the bottleneck, adds latency, your home connection handles all the client's traffic
You can maintain both configurations — one split-tunnel config for daily use, one full-tunnel config for when you're on untrusted networks.
Backup and Recovery
Your gateway's configuration is critical. Back it up:
# Backup script
sudo tar czf /root/vpn-gateway-backup-$(date +%Y%m%d).tar.gz \
  /etc/wireguard/ \
  /etc/nftables.conf \
  /etc/unbound/ \
  /usr/local/bin/wg-add-client.sh \
  /etc/sysctl.d/99-vpn-gateway.conf
Store the backup off the gateway — on your NAS, in an encrypted cloud backup, anywhere that survives the gateway dying.
To restore: install the base OS, restore the tarball, install packages, start services. You should be able to rebuild the gateway in under 30 minutes.
Wrapping Up
A dedicated VPN gateway is a clean separation of concerns in your homelab. Your VPN configuration doesn't get tangled with your application servers. Your firewall rules are centralized in one place. Your clients have a single, hardened entry point.
The hardware cost is minimal — a used mini PC or a VM with 512MB of RAM. The setup takes an afternoon. And the result is a professional-grade remote access solution that you fully control.
Start simple: WireGuard, basic NAT, a couple of clients. Add DNS, firewall policies, and monitoring as you get comfortable. The gateway pattern scales well — whether you have 2 clients or 20, the architecture is the same.